I recently got an STM32N6 Nucleo board, and I’d like to run some TinyML projects to test the speed of the built-in NPU. I’ve decided to share my learning journey here as I explore it. This will be an evolving post that I’ll keep updating.
Introduction
The STM32N6 is the first generation of STM32 MCUs that features a dedicated NPU. However, it is not the only MCU with built-in AI acceleration. Other manufacturers also offer MCUs with integrated NPUs for Edge AI applications , for instance, Texas Instruments with the TMS320F28P55x series, NXP with the MCX N Series, Renesas with theRA8P1, and Infineon with the PSoC Edge (E83 / E84).
Let’s take a moment to understand some terminology used in the STM32N6 datasheet so that we can plan ahead for any Edge-AI projects involving the STM32N6.
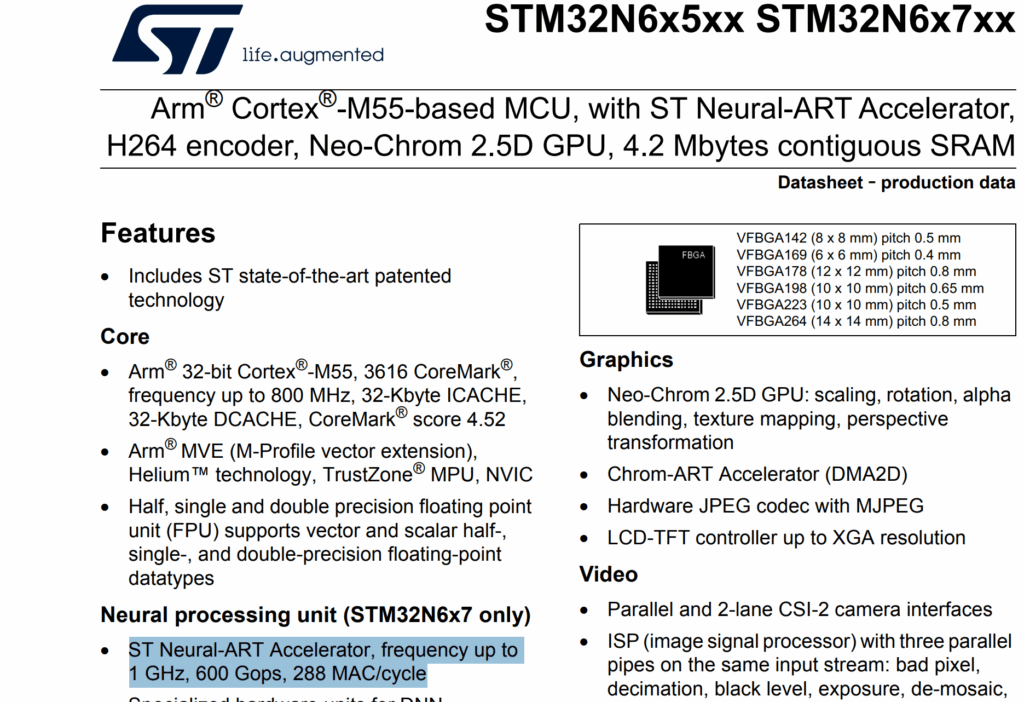
In the STM32N6 datasheet, under the Neural Processing Unit section, it says: “ST Neural-ART Accelerator, frequency up to 1 GHz, 600 GOPS, 288 MAC/cycle.”
One key thing NPU does is called a MAC, short for Multiply-Accumulate. Basically multiplying a number by a weight and adding it up, which is what neural networks do all the time (“MAC” = Multiply + Add). The datasheet says it can do 288 MACs every single clock cycle, and with a top speed of 1 GHz, that adds up to 600 billion operations per second (600 GOPS!). In simple terms, it’s super good at crunching numbers really fast, so your Edge-AI projects can run smoothly right on the chip. In other words, it means doing two math steps together:
( 𝐴 × 𝐵 ) + 𝐶
For example: If your MCU does ( 2 × 3 ) + 5 = 11, that’s one MAC operation.
So here is the summary:
1 GHz
The NPU runs 1 billion cycles every second.
288 MAC/cycle
Every single cycle, it can do 288 “multiply-and-add” operations.
600 GOPS
That means it can do about 600 billion small math operations per second (multiply + add).
Project#1 : Image Capture with STM32N6 Nucleo and Raspberry Pi V2 Camera ( Sony IMX219 sensor)
Project Goal:
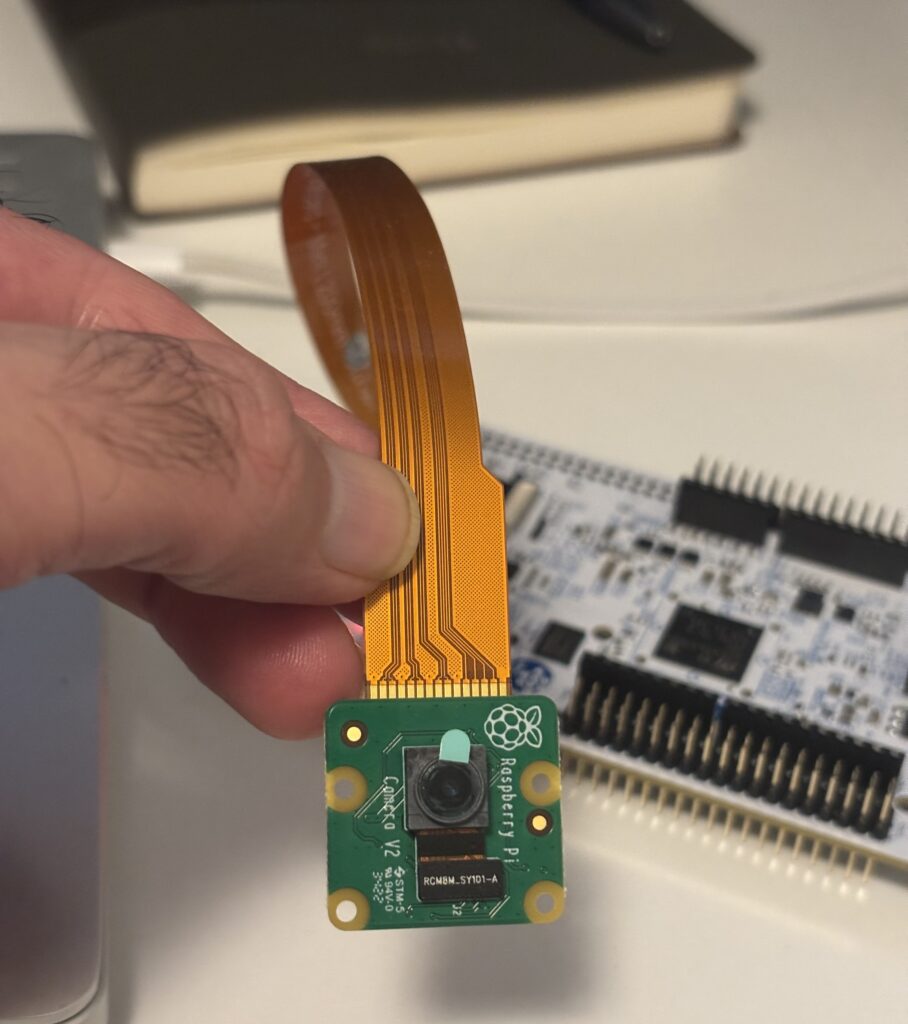
The goal of this project is to capture an image with STM3N6’s MIPI CSI-2 interface, DCMIPP snapshot mode using Rasperry Pi V2 Camera. There is a camera connector on STM32N6 Nucleo board (CN6) for connecting a camera with Camera Serial Interface – 2, which is the same interface with RPi CAMs. Before I chose RPi CAM, I was checking some cameras that are compatible with the STM32N6, and I thought the best option might be the B-CAMS-IMX, as ST provides some sample code. However, it’s a bit pricey, around $78–$80 on Mouser and Digikey 😉 So, I decided to buy the Raspberry Pi Camera V2 instead, which costs about $15. In my opinion, the idea of implementing a TinyML project is to achieve a lower BOM cost, so I decided to challenge myself to explore how to get image from the Raspberry Pi Camera V2. I know it might be a bit of a challenge, as I’ll need to find the information piece by piece, but I think that’s the beauty of the journey.
Lessons Learned: The STM32N6 Nucleo board (CN6) uses a 22pos 0.5 mm FPC connector, whereas the RPi Camera has a 15pos 1 mm FPC connector. Therefore, you need a 22pos to 15pos cable adapter, which you can buy from here.
The first step is to confirm whether the STM32N6 can communicate with the RPi CAM V2 via I2C. I usually like to break down a big project into smaller subtasks. For example, in this case, the goal is to take a photo with the camera. So the subtasks will be:
Confirm I2C communication between STM32N6 and RPi CAM
Establish CSI-2 communication and use DCMIPP
Take a photo and send it to the PC via USB port
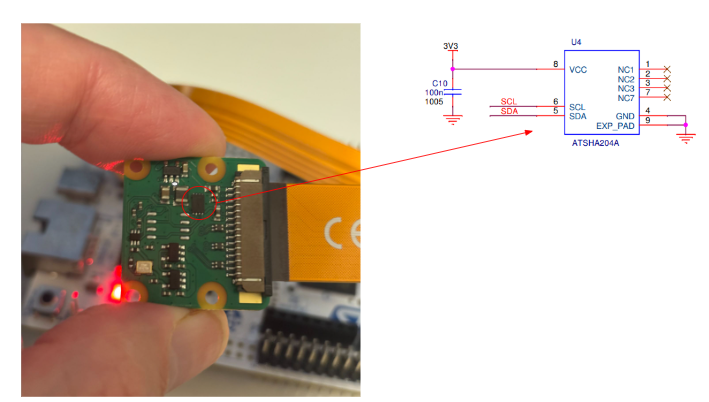
While reviewing the schematic of the RPi V2 CAM, I noticed that there are two components on the camera module connected to the I2C pin:
ATSHA204A chip
MX219 sensor.
According to their datasheets, the ATSHA204A is a hardware authentication chip with an I2C address of 0x64, and the IMX219 sensor has an address of 0x10. Here is the ATSHA204A on the camera module :
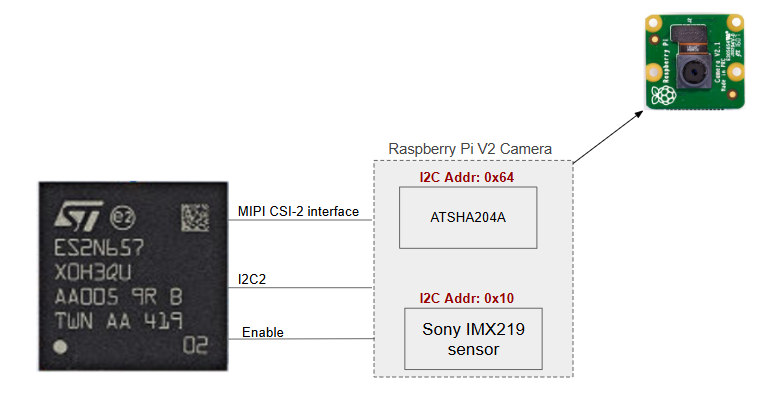
Here is a diagram showing how the STM32N6 is connected to the RPi CAM and the addresses of the I2C devices.
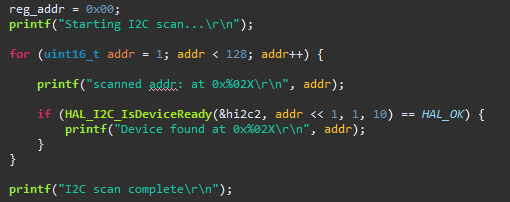
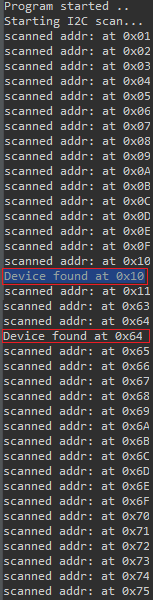
Out of curiosity, I wrote a small C program in STM32CubeIDE to scan all I2C devices connected to the STM32N6. If a device is found, it prints the device address in the STM32CubeIDE terminal. As expected, it detected both the ATSHA204A and Sony IMX219 sensor addresses.
Here is a screenshot of the code and the terminal output:
In the next update:
I’ll Set up the DCMIPP interface in STM32CubeIDE to capture image data, coming soon! Stay tuned and keep checking back for updates. 😉